

How To Remove Red Marker From Screenshot Iphone
If you lot're running iOS xi, you lot may have noticed that taking a screenshot is a picayune unlike than in previous versions of iOS. You'll still press two buttons and see the screen flash, but across that, you take a ton of new editing options. Here'south what you need to know most screenshots and iOS eleven.
So what'southward new with iOS xi and screenshots?
Commencement and foremost: Screenshots no longer ataxia up your Photos library if you don't want them there. Apple tree has added 2 incredibly useful features to make this work: a Screenshots album, and the new Screenshots floating interface.
Existing device screenshots have been sorted into iOS eleven'south new Screenshots album, where you can delete unwanted screens en masse.
Additionally, when you accept a new screenshot (or series of screenshots in a short menstruation of fourth dimension), the snap minimizes itself in the bottom left corner of the screen. From here, you accept 4 options:
- You can leave it alone, and the thumbnail will vanish, saving itself to your Photos library later on a few moments.
- You can swipe it off-screen to save it to your Photos.
- You lot can long-press on the thumbnail to ship it as-is via the Share Sail.
- Y'all can tap on the thumbnail to enter Markup mode, where you can make edits to your screenshot and send it via the Share Sheet — without ever having to relieve it to your Photos library.
These new options finer supercharge the screenshots characteristic on your iPhone and iPad, offer a slew of new options for screenshot-takers.
Why should I even intendance well-nigh new screenshot features, anyway?
While tech writers (hi) and developers use screenshots with some frequency and thus have skin in the game when information technology comes to these improvements, the new screenshot features are also pretty crawly for the everyday iPhone or iPad user. Here are merely a few ways y'all tin use these screenshot features:
- Taking a screenshot of an existing photo and using Markup to make a meme
- Snapping a shot of Maps for an upcoming trip and using the Apple tree Pencil and iPad to circle your destinations and add notations
- Taking a screenshot of a funny iMessage conversation and cropping out (or blacking out) unnecessary data with the Markup characteristic
- Snapping a shot of your new loftier score and adding highlights with Markup
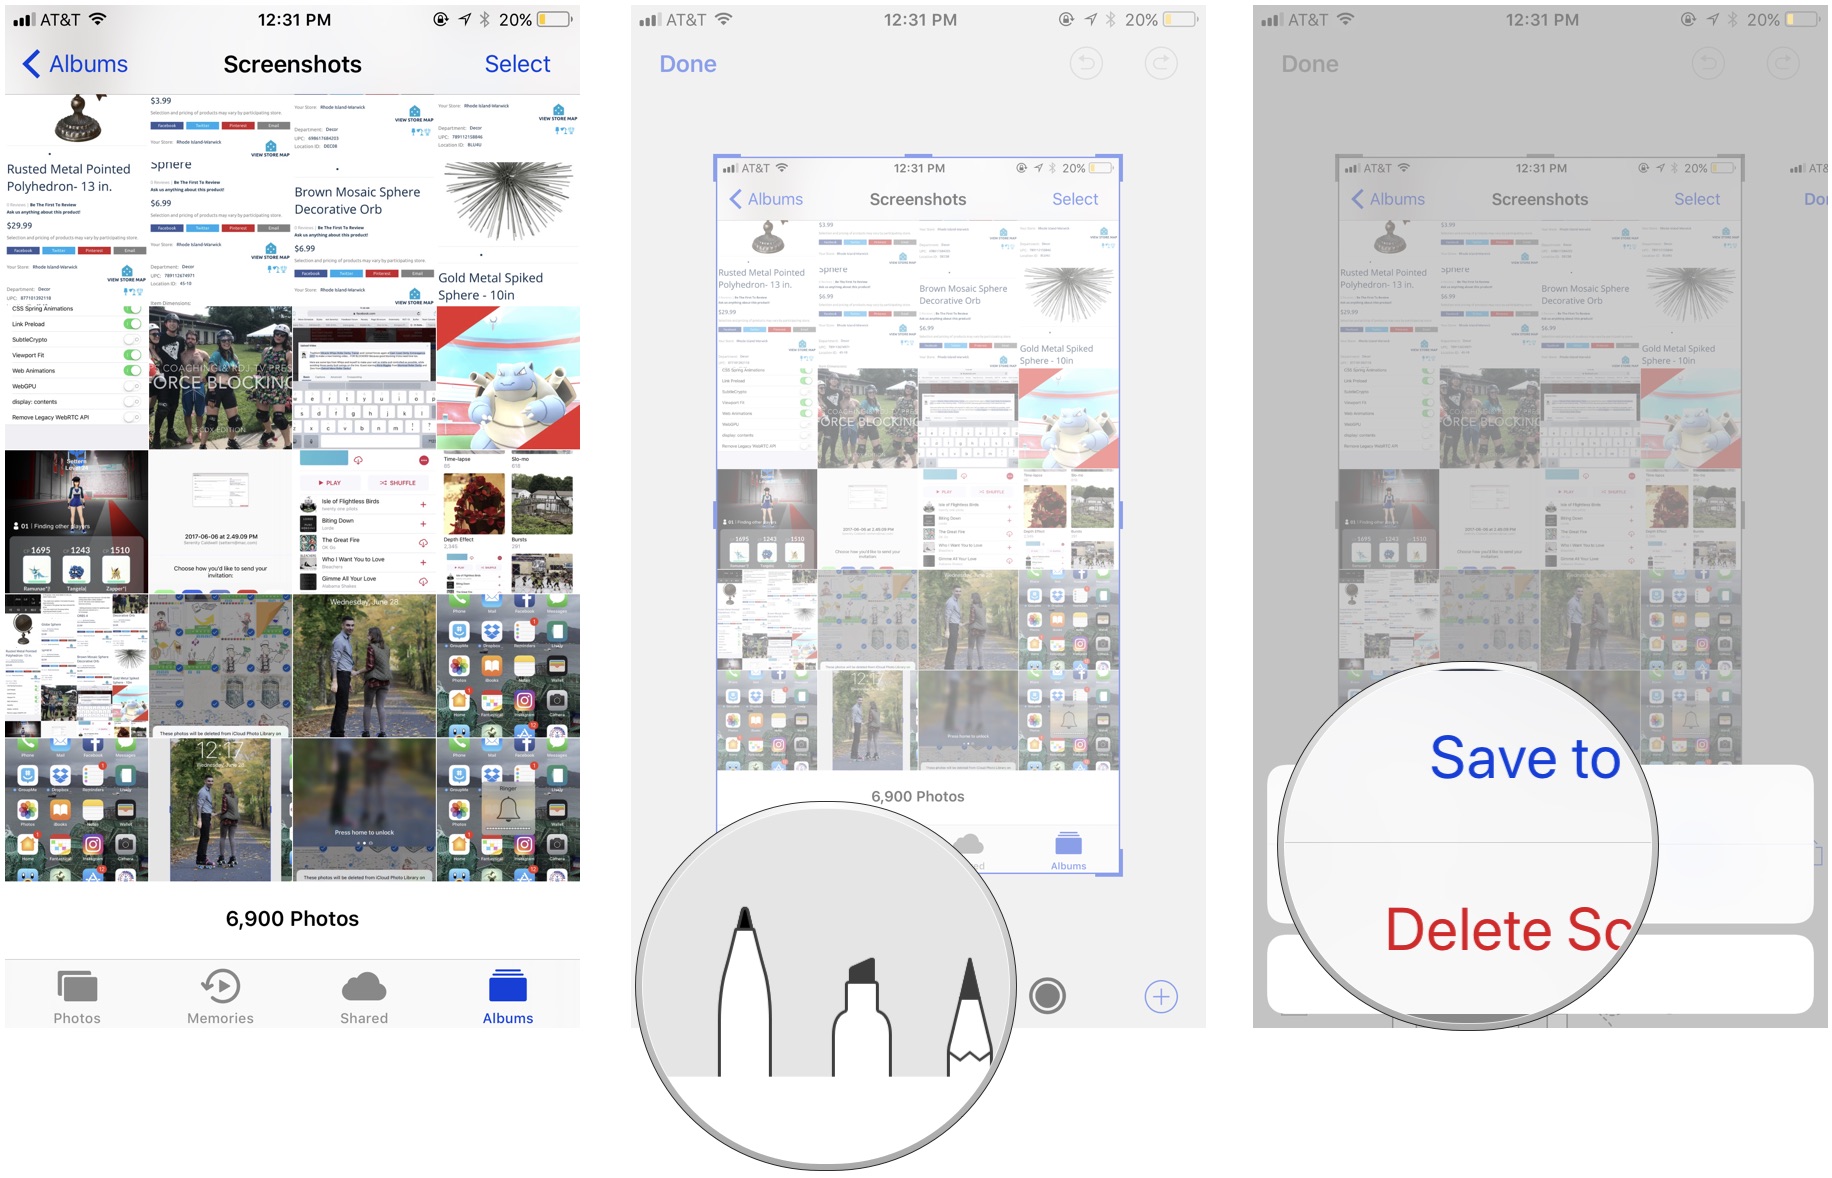
How to delete former, unwanted screenshots in Photos in iOS 11
- Open the Photos app.
- Select the Albums tab.
- Open the Screenshots album.
- Tap Select.
- Tap Select All.
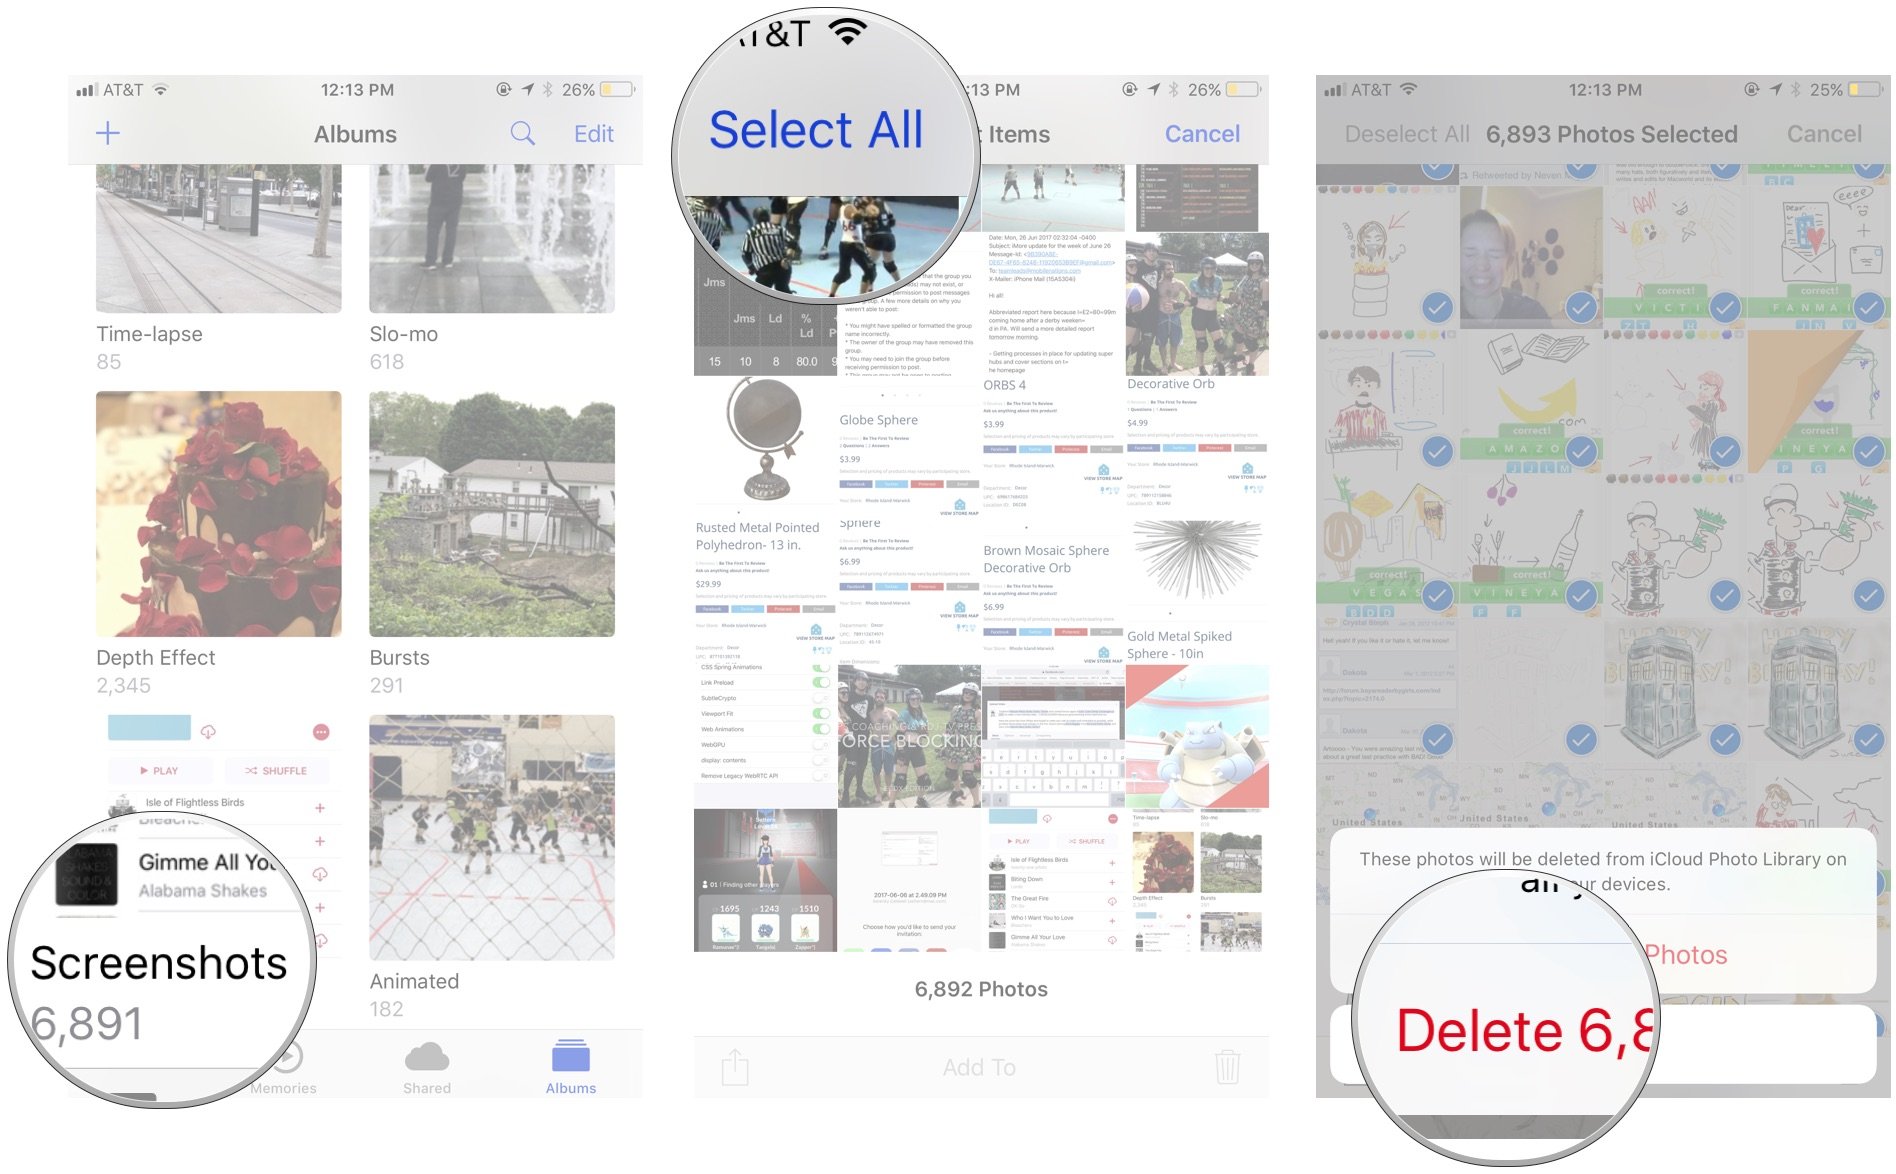
- Press the Delete icon (looks like a trash tin can).
- Ostend that you wish to Delete these screenshots.
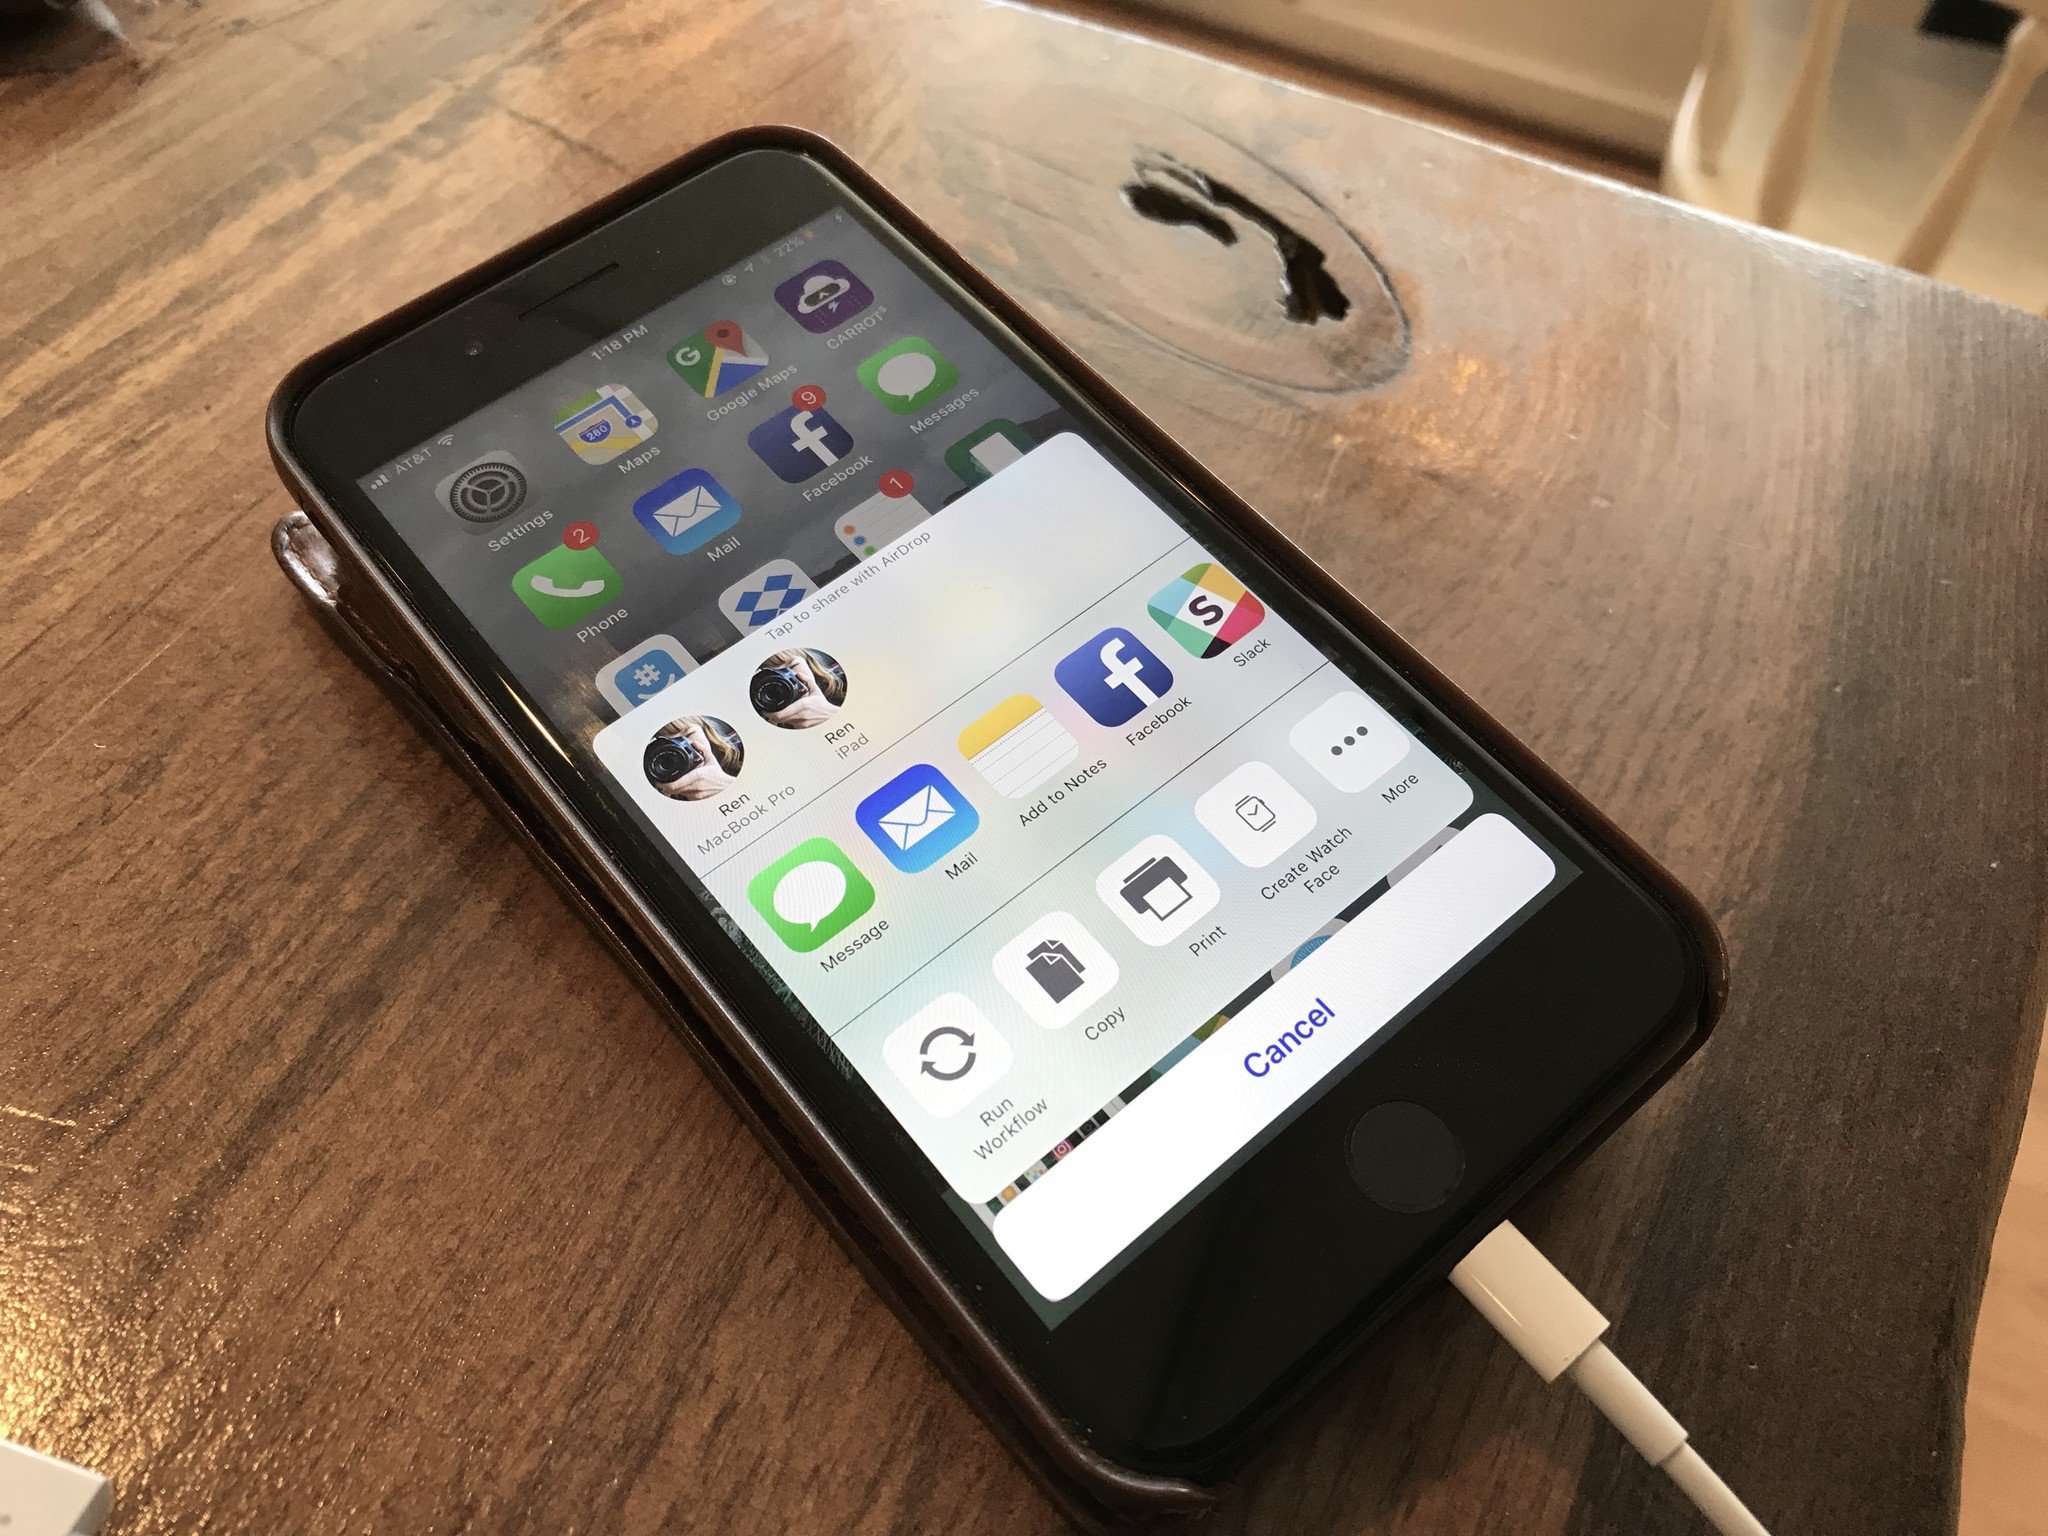
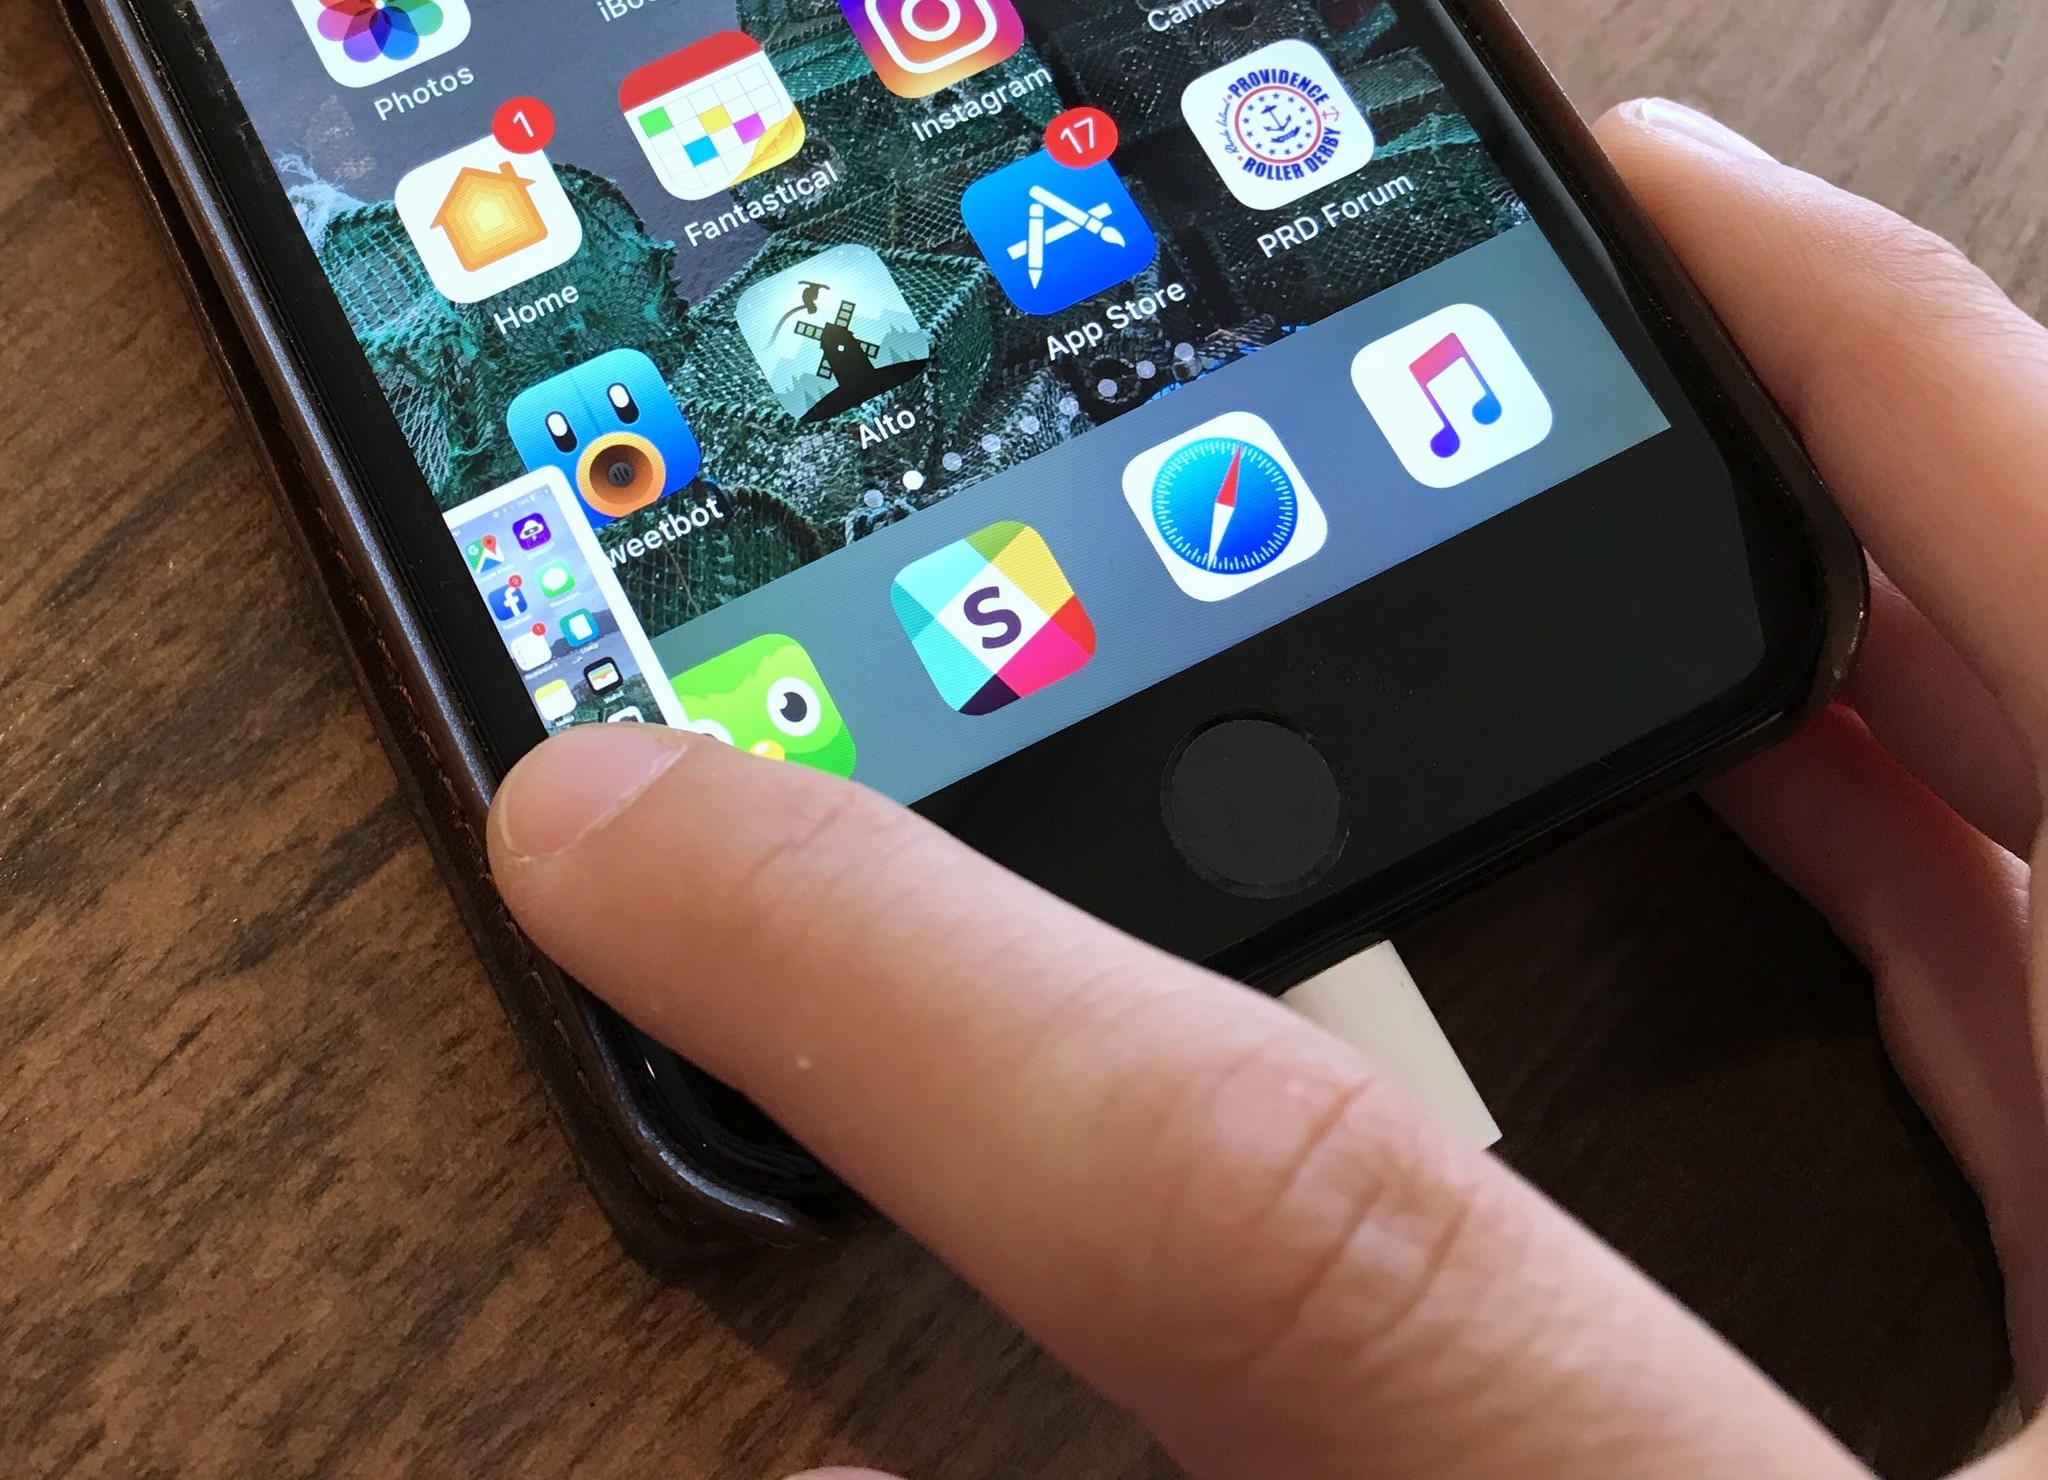
- Take a screenshot (or multiple screenshots in a row) on your iPhone or iPad past pressing the Home and Power buttons simultaneously.
- Press and concord on the screenshot thumbnail(south).
- Cull the selection you desire in the Share Sheet.
- If you want to delete the screenshot(due south) later sending, tap on the thumbnail.
- Press Done.
- Select Delete Screenshot(s).
How to speedily relieve a screenshot
Don't want the screenshot thumbnail to linger on your screen? Here'southward how to save it to your Photos library and be washed with it.
- Take a screenshot (or multiple screenshots in a row) on your iPhone or iPad by pressing the Home and Power buttons simultaneously.
- Swipe left on the thumbnail(s) to dismiss them.
How to mark upwards new screenshots
- Take a screenshot (or multiple screenshots in a row) on your iPhone or iPad past pressing the Habitation and Power buttons simultaneously.
- Tap on the screenshot thumbnail(s).
- Use the markup tools provided below to accommodate your screenshot accordingly.
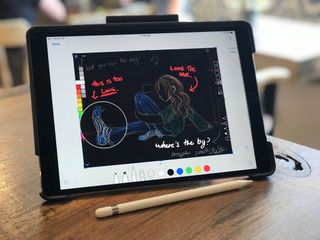
How to use the unlike Markup tools for altering screenshots
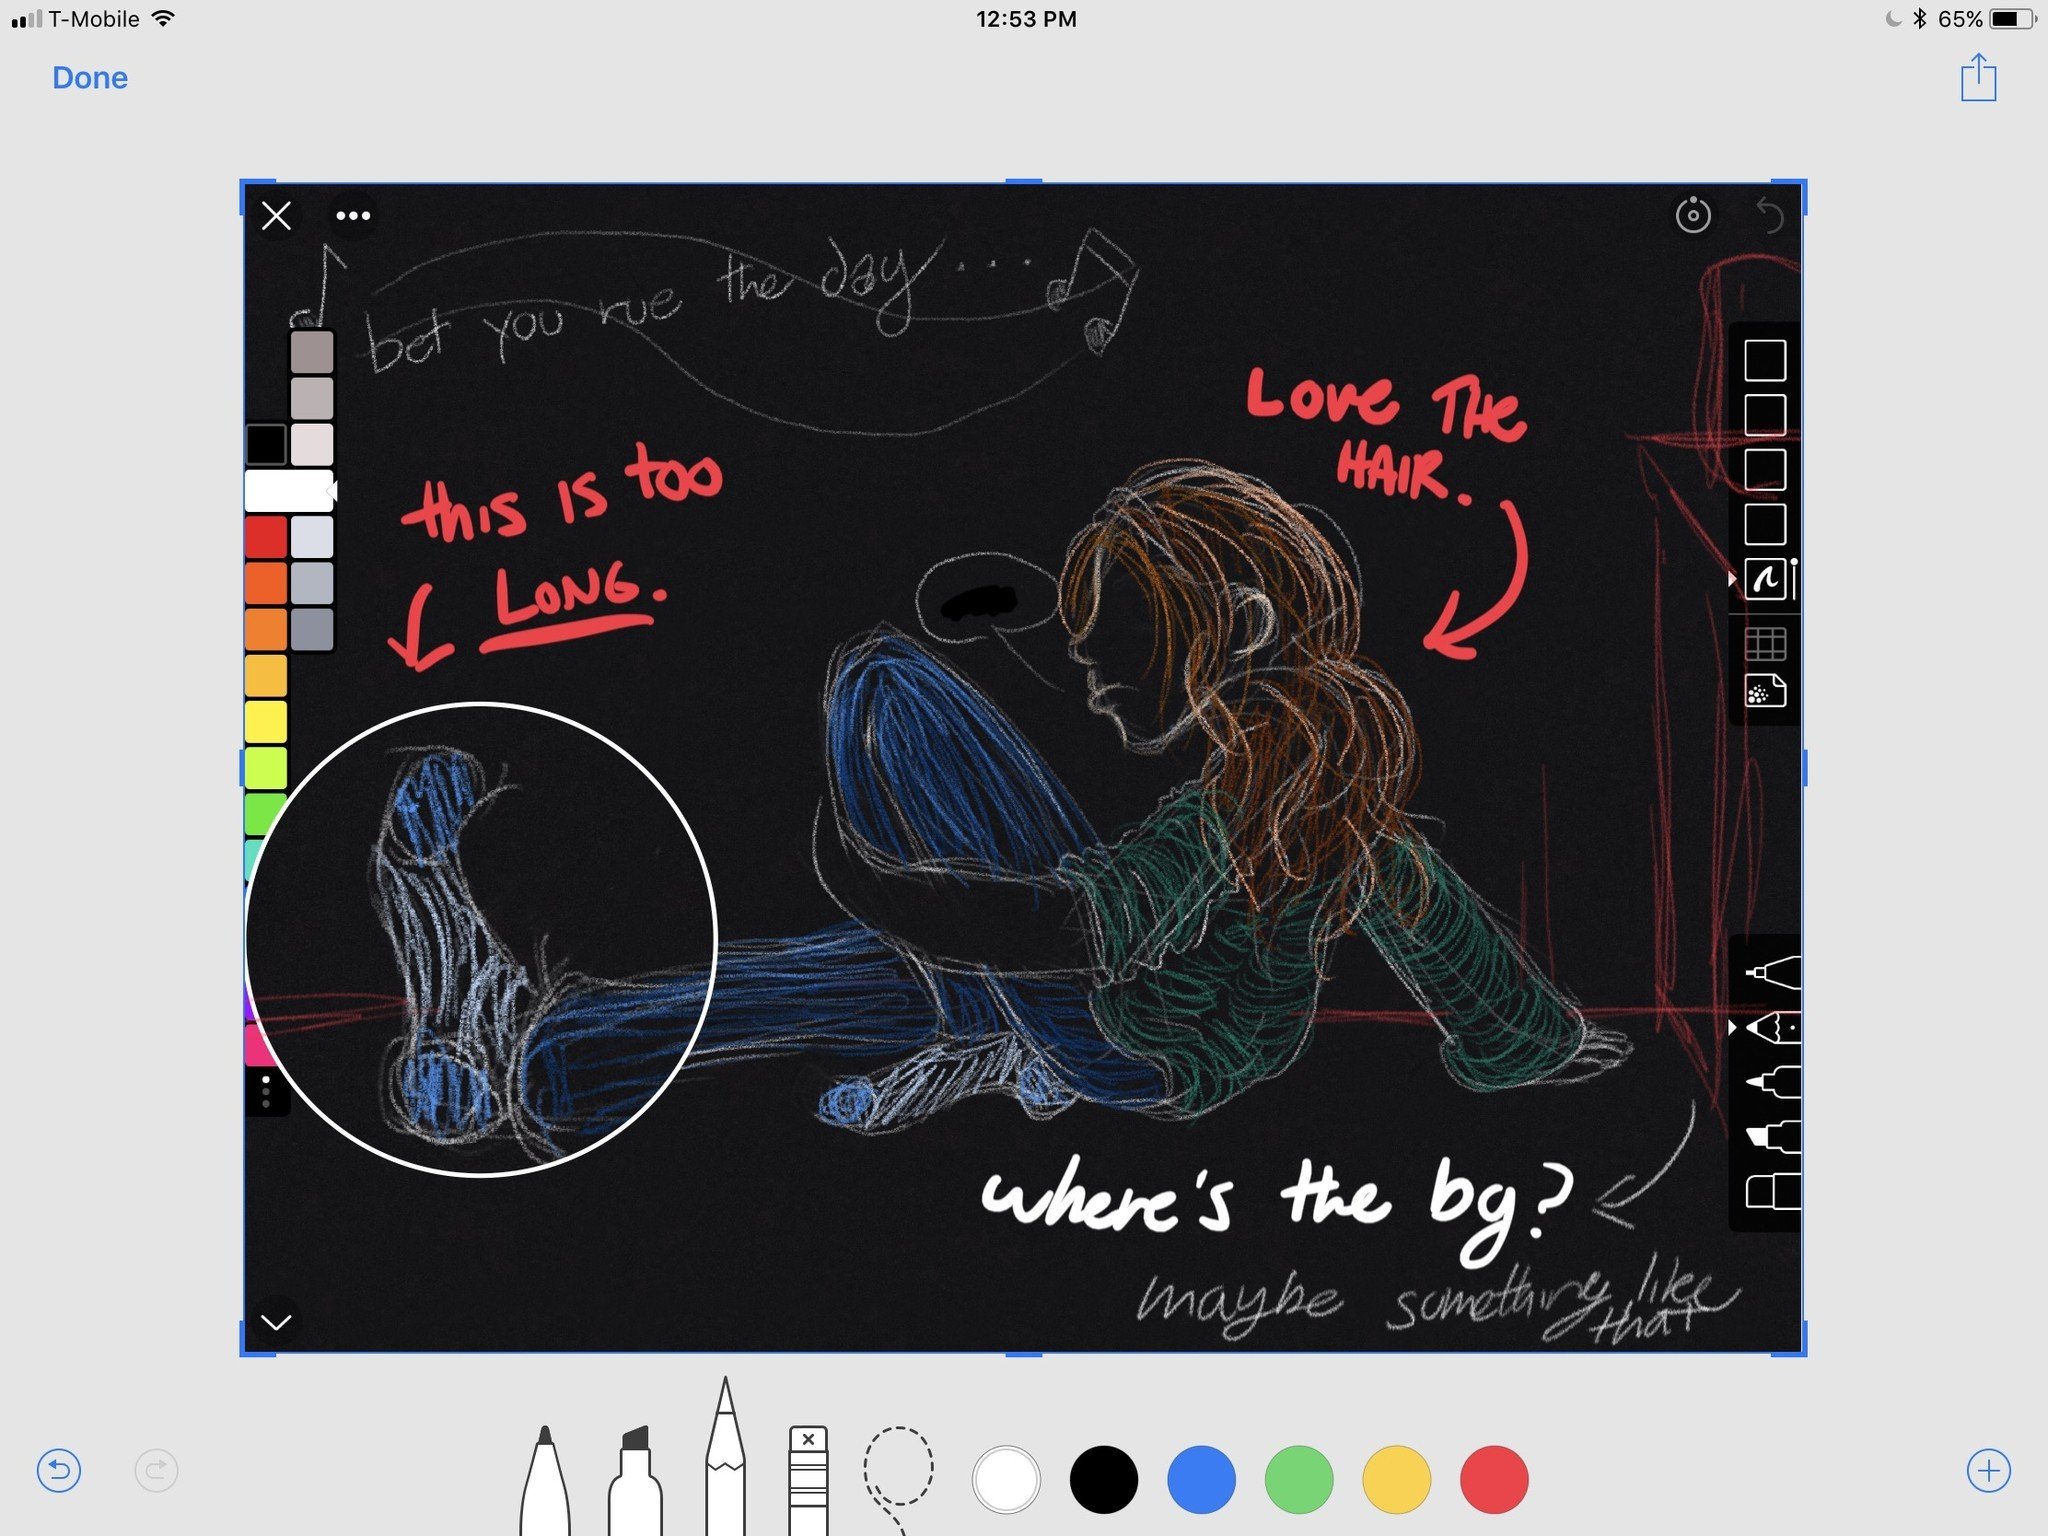
At that place are several Markup tools bachelor for screenshots in iOS eleven:
- The Crop Tool: Enabled past default in Markup way. To crop your image, merely drag on any side or corner of the screenshot.
- The Marker Tool: This allows you to marking upward data in an angled marker style.
- The Highlighter Tool: This allows you to mark up information with a digital highlighter.
- The Pencil Tool: This allows you to marker up information with a digital pencil tool.
- The Eraser Tool: This tool can erase whatever markup you've made.
- The Lasso Tool: This tool can highlight and movement whatever markup you've made.
- The Color Tool: This can modify the colour of your markup tools. Palette currently limited to black, white, bluish, green, xanthous, and red.
- The Text Tool: Available under the + button in the lower correct corner, the Text tool lets you add together typed text. This pairs with the Font tool (on screen only when Text is highlighted), which lets you change font size, style, and alignment.
- The Signature Tool: Available under the + push button in the lower right corner, the Signature tool lets you add existing or new signatures to the screenshot.
- The Magnifier Tool: Available under the + button in the lower right corner, the Magnifier tool adds an adjustable magnified circle to the screenshot. You can adapt size by dragging the bluish Edit dot, and magnification by dragging the colored Edit dot. Yous can also modify the circle'due south color past tapping on a different colour with the Magnifier circle selected, and alter circle thickness by tapping on the Shape tool (visible simply when the Magnifier tool is selected).
- The Shape Tools: Bachelor under the + push in the lower right corner, the Shape tools offer empty squares, circles, speech bubbles, and arrows that you tin can suit as necessary. As with the Magnifier tool, you lot can conform positioning with the blue Edit dots and shape angle with the colored Edit dots (if applicable). You tin can as well change the fill or border size by tapping on the Shape tool (visible just when the Magnifier tool is selected).
How to utilise Instant Markup in iOS xi
- Mark up your screenshot accordingly.
- Press the Share push button.
- Choose the option you want in the Share Sheet.
- After sending, tap on the thumbnail.
- Press Washed.
- Select either Delete Screenshot(s) or Save to Photos.
Questions most iOS 11 and screenshots?
Other questions almost how iOS 11'south screenshots interface works? Permit me know in the comments!
Source: https://www.imore.com/how-take-screenshot-iphone-or-ipad-ios-11
0 Response to "How To Remove Red Marker From Screenshot Iphone"
Post a Comment